Ground reference maneuvers are low-altitude flight exercises that train you to hold a desired ground track while wind, groundspeed, and drift constantly try to pull you off it. The practical payoff is control: you learn to adjust bank and heading on the fly instead of after the fact. The FAA's Airplane Flying Handbook treats these maneuvers as the baseline for judging whether a student pilot has real command of the airplane, not just the controls.
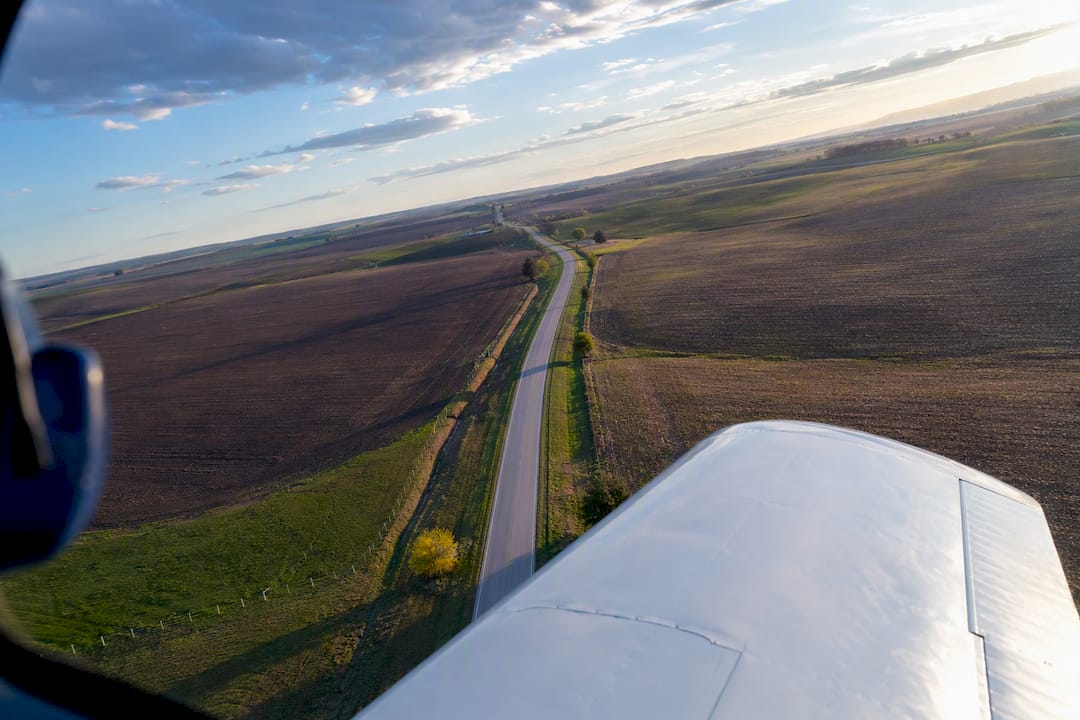
These exercises take the four fundamentals you already know, straight-and-level flight, turns, climbs, and descents, and force you to apply all of them at once while watching something outside the airplane instead of the instruments. That's the entire point. A turn around a point isn't really about the turn. It's about noticing that your airplane's path over the ground keeps changing shape even though your control inputs feel consistent.
The reason comes down to one distinction most new students miss: airspeed and groundspeed are not the same thing. Your airplane might hold a steady 90 knots through the air, but if a 15 knot wind is pushing you from behind, your groundspeed spikes and your turn radius wants to balloon outward unless you steepen the bank to compensate. Fly into that same wind on the other side of the circle, and your groundspeed drops, so the bank has to shallow out or you'll overturn.
Mastering this transfers directly to real flying. Consider:
Every ground reference maneuver happens close to terrain, which raises the stakes if something goes wrong. The FAA generally recommends flying these maneuvers between roughly 600 and 1,000 feet above the ground, low enough to see wind effects clearly on your reference, but high enough to leave a real margin for recovery, according to technique guidance summarizing the AFH.
Before you touch a control input, run through the setup properly.
The FAA Risk Management Handbook frames this kind of pre-maneuver check as a repeatable routine, not a one-time box to check. Building that habit now pays off in every phase of flying you'll do later.
Before you attempt anything circular, you need to prove you can hold a straight ground track through a crosswind. Pick a long, straight reference, a road, a section line, a set of power lines, and fly directly along it with the nose pointed anywhere the wind demands.
That's the whole skill: crabbing into the wind just enough that your ground path stays glued to the line even though your nose is pointed somewhere off to one side. Too little correction and you drift downwind of the road. Too much and you cross over to the upwind side.
Build the skill in stages:
The scan that makes this work involves alternating between a point far ahead on your line and the reference passing underneath you. Watching only the nearby ground gives you no warning before you drift; watching only the distant point gives you no immediate feedback. You need both, cycling every few seconds.
This is the maneuver most instructors introduce first because it isolates the wind-compensation problem into its purest form: fly a constant-radius circle around a fixed point on the ground using nothing but continuous bank adjustment.
Watch your wingtip in relation to the point at each quadrant. If the point appears to slide outward from under your wingtip, your radius is expanding and you need more bank. If it swings inward toward the fuselage, you've overbanked.
S-turns take the same bank-versus-groundspeed logic from turns around a point and apply it across two opposing half-circles, crossing a straight reference line at a 90 degree angle every time.
Pick a road or section line running perpendicular to the wind. Cross it at exactly 90 degrees, roll into a half-circle on one side, cross back through the same point at 90 degrees again, then roll into the opposite half-circle on the other side. Each pass has to hit that crossing angle cleanly or the whole maneuver looks lopsided from the ground.
The bank sequencing mirrors what you already learned in turns around a point:
Practice this by breaking each half-circle into three segments mentally, roll-in, mid-turn, shallow-out, and calling each one out loud. That segmented rhythm is exactly how instructors coach smoother, more anticipatory corrections rather than reactive ones.
The rectangular course exists to simulate exactly what you'll fly in every traffic pattern for the rest of your flying career: four legs, four turns, and a constant distance from the ground reference on your downwind leg.
This one connects directly to real pattern work, right down to how air traffic control expects consistent spacing from pilots flying non-towered and towered patterns alike.
Figure-eight maneuvers layer a reversal of turn direction on top of everything you've already practiced, which makes them a natural next step rather than a starting point.
That's why eights-on-pylons shows up at the commercial level rather than during private pilot training. It demands constant altitude adjustment, not just bank adjustment, to keep the pivot point locked. The lazy eight, a related but distinct maneuver, adds climbing and descending segments to a wide, sweeping figure-eight pattern and requires the same reference-point discipline described in the Airplane Flying Handbook's lazy eight chapter. Don't attempt any of the pylon variants until turns around a point and S-turns feel automatic. AOPA's guidance on maneuver progression is blunt about this: rushing ground reference work before the four fundamentals are solid is the root cause of most execution problems students run into later.
The gap between a student who "gets" ground reference maneuvers and one who's still fighting them almost always comes down to timing. Anticipating a drift correction a second or two before the visual cue shows up produces noticeably smoother corrections and fewer altitude wobbles than waiting to react.
A few drills accelerate that timing:
For scanning, cycle attention in a fixed rhythm: reference point, wingtip alignment, altimeter, back to reference. Skipping the instrument check entirely is a common shortcut that costs students altitude control. Maneuver lessons are typically built around this kind of repetition, short focused blocks in the air paired with a debrief that isolates which specific quadrant or leg needs more work, rather than a vague "do it again" approach.
Most ground reference struggles trace back to one of a handful of root causes, and recognizing which one you're dealing with saves a lot of frustrated circles in the sky.
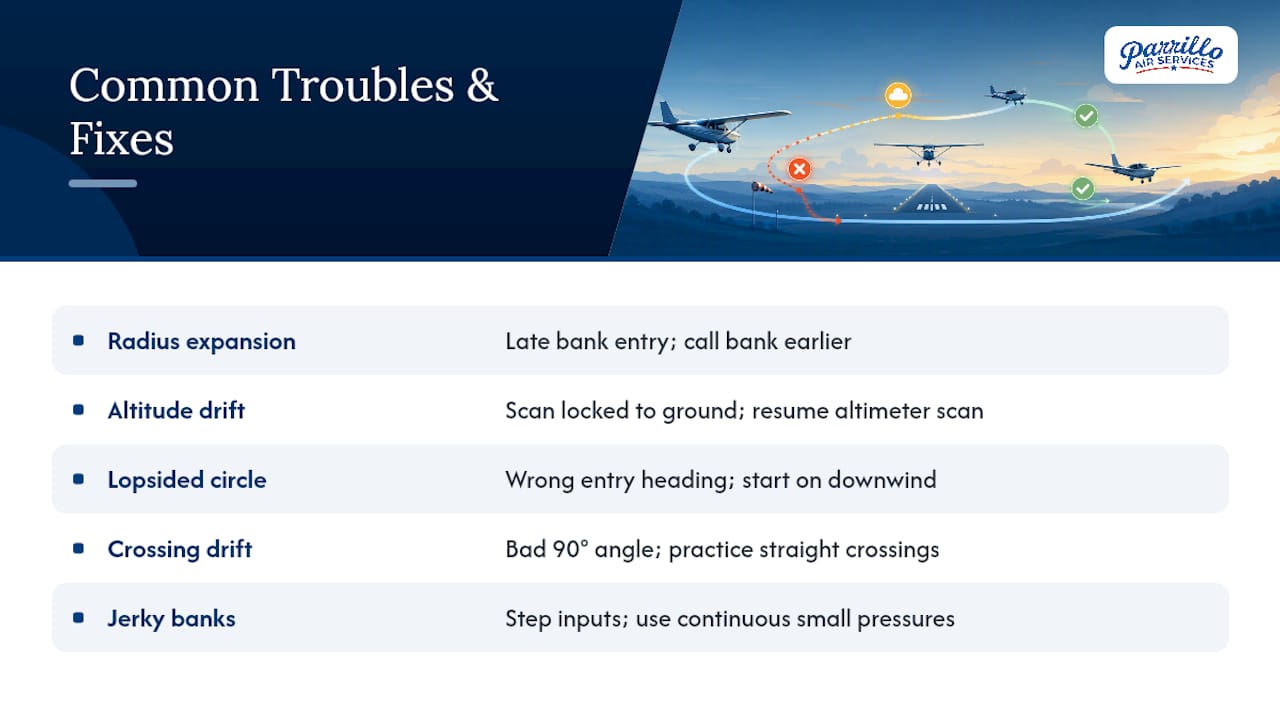
Radius keeps expanding on one side of the circle. You're probably late rolling into steeper bank as you enter the downwind quadrant. Fix it by calling out the bank change a beat earlier than feels natural.
Altitude creeps up or down during turns. This almost always means your scan has locked onto the ground reference and abandoned the altimeter. Force yourself back into the reference, wingtip, altimeter rhythm.
The maneuver looks lopsided from directly above. Check your entry heading. Ground reference maneuvers are supposed to start on a downwind heading; entering crosswind or upwind throws off your bank sequencing from the first turn.
You're consistently drifting off the S-turn crossing line. Your 90 degree crossing angle is probably off, even a 10 degree error compounds across each half-circle. Reset by flying a few practice crossings without turning, just to nail the angle.
Bank changes feel jerky instead of smooth. You're adjusting in steps rather than continuously. Practice small, constant pressure adjustments on the ailerons instead of discrete corrections every few seconds.
Most of these fixes share a theme: they're timing problems, not control problems. Once the anticipation clicks, the physical flying gets noticeably easier.
The technique stays constant across airplanes, but the sight picture and timing shift depending on what you're flying. A high-wing trainer gives you a clear view straight down along the wing strut, which many instructors use as the primary alignment reference for wingtip position relative to the ground point. A low-wing trainer blocks that same view, so students typically shift to using the actual wingtip or a spot along the trailing edge instead.
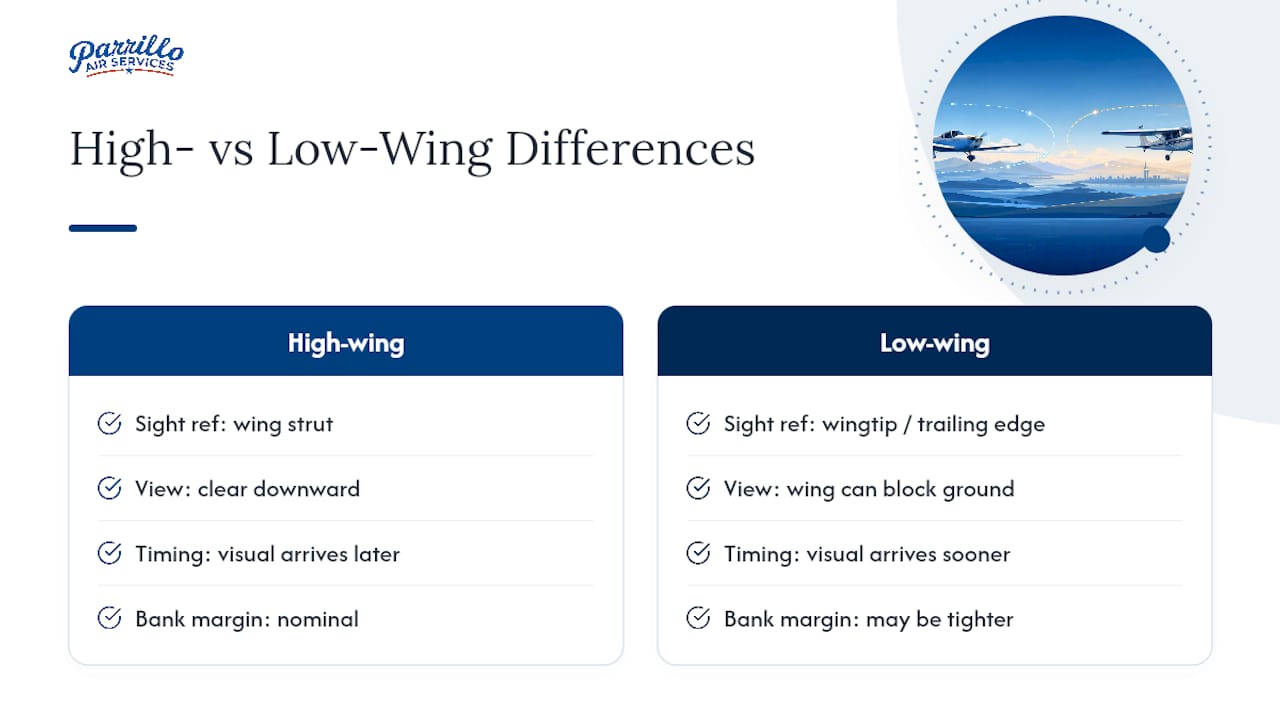
Performance differences matter just as much as visibility. A faster, higher-performance trainer covers ground more quickly, which compresses the time you have to judge drift and roll into the correct bank before overshooting a quadrant. That means the anticipation timing discussed earlier becomes even more critical in a faster airplane, the visual cues arrive sooner and demand a quicker response.
Wing loading and stall margin also shift the safe bank range slightly between aircraft, which is why checking predicted stall speed at your planned bank angle matters regardless of what you're flying. A 45 degree bank that leaves comfortable margin in one trainer might sit closer to the edge in another, particularly at higher weights or altitude. If you're training in multiple aircraft types, expect a short recalibration period each time you switch, your technique transfers, but your sight picture and timing need a few practice circuits to reset. Reviewing the differences between common training aircraft before a checkout flight helps you anticipate that adjustment instead of getting surprised by it mid-maneuver.
Examiners aren't grading whether you can eventually land in the right spot on a turn around a point. They're watching for smoothness, consistent spacing, and coordinated control inputs throughout, the same qualities that separate a competent pilot from one who's just muscling the airplane through a pattern. Practicing these maneuvers two or three times per lesson block, rather than once and moving on, is what actually builds the muscle memory examiners are looking for. Weak legs in your rectangular course or a lopsided S-turn aren't flaws to hide before a checkride. They're exactly what a good lesson plan should isolate and drill until they stop being weak.
— Gm
Reading about bank sequencing only gets you so far. At some point you need an instructor watching your wingtip alignment in real time and telling you the half-second before you needed to roll into that steeper bank. Some FAA Part 61 flight training programs build their courses around focused coaching, with structured lessons that isolate one skill at a time instead of throwing every maneuver at you in a single overwhelming flight.

A dedicated maneuver lesson typically starts with a short ground brief covering the day's wind conditions and which references will be used, moves into a focused airborne block practicing turns around a point, S-turns, or rectangular course work, and wraps with a debrief that pinpoints exactly which quadrant or leg needs more repetition next time. If you're still deciding whether flight training is the right next step, a discovery flight with Parrillo Air Services is the most direct way to see this coaching style firsthand and get a real feel for what focused, personalized instruction looks like before committing to a full program.
Train with focused, one-skill-at-a-time coaching from Parrillo Air Services in Lynchburg, VA.
Get in TouchStudy these alongside your flight lessons, not instead of them: